
AHU TDI Caddy Swap Using the S&P Automotive Swap Kit
About a year ago I did a review on the MK1 TDI swap kit offered by S&P Automotive on here in plans on starting a TDI swap on a caddy I had recently purchased. Well like all projects this one took longer to get to than it should have and thanks to another friend with a VW shop who had some down time, we got a good bit of it knocked out in one day.
To give you a time frame about how long the swap has taken so far (I’m currently working on it when I have the time) we got the old motor pulled out, mounts put on and everything changed and the motor thrown back in in about 10 hours. This included doing all of the video work too, which takes a lot longer than you would think to do. And then I have another 3 or so hours on the cable clutch and rod shift stuff making all of that work right. So overall it has been a pretty fast and easy swap. I would guess that the person with average mechanical skills could do the whole swap over a weekend or a 3 day weekend easy enough and have time for any troubleshooting that may be needed.
Lets take a look at what all you can get from S&P to make a Mk1 TDI swap as easy as possible. In this video I cover the parts included in the kit, as well as some additional bits I didn’t have in the original video like the TT downpipe and the wiring harness and DBW pedal bracket.
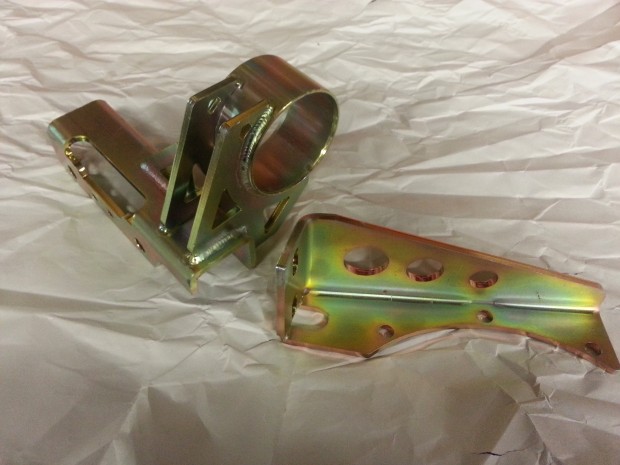
Transmission Top Mount and Rear Transmission mount for O2A Transmissions. If you are doing an O2J swap the mount may be slightly different. They Also offer mounts for an O2m 6 speed if you are going that route.
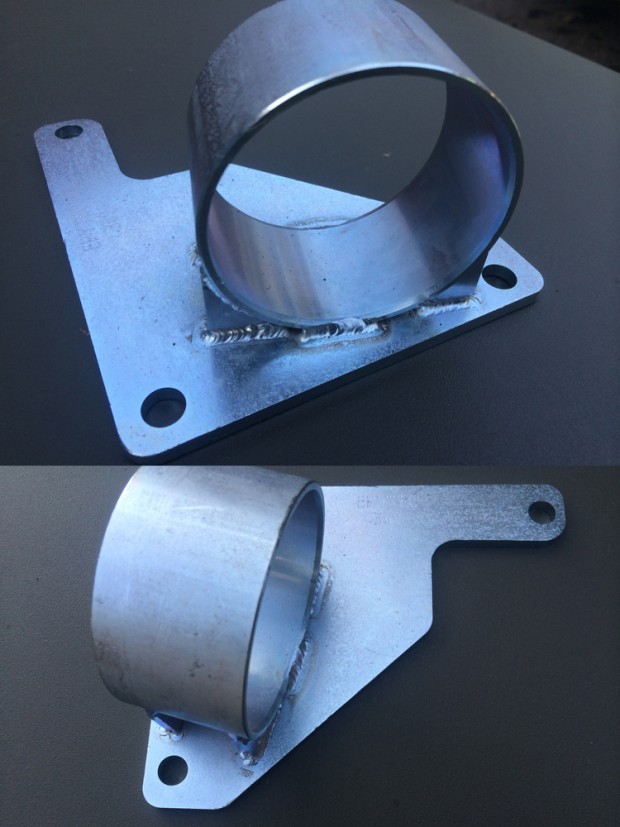
Passenger side motor mount. You can use a stock gasser passenger side mount. The ting I like about this mount is it has a nice beveled edge inside of it making bearing installation easier.

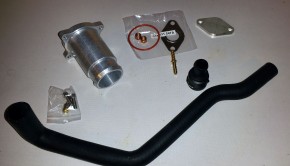
O2A rod shift conversion. While this part is not necessary to make the swap work. You can keep it cable shift and modify the MK3 shift box to mount inside the MK1. I like this because it keeps the truck as stock as possible and is pretty cool.
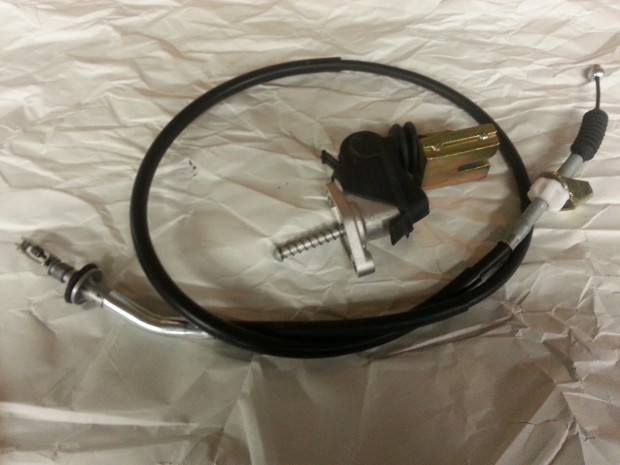
Cable clutch conversion for the O2a. This setup is from a VR6 Eurovan. I really like the feel of a cable clutch O2A. My VR6 rabbit has one on it and it has been nice. I believe they are working for an under dash setup for those wanting to put a hydraulic clutch in their MK1 and not cut up the firewall to do so.
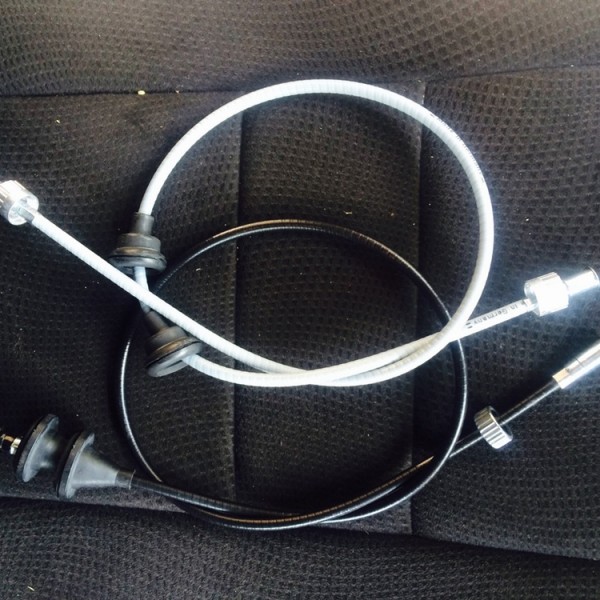
Speedo cable to go from the O2A to the factory mk1 cluster. If you are doing this swap and keeping it as factory as possible this beauty lets you screw into the factory O2A speedo gear and into your MK1 cluster with no changes made.

Mk1 to MK4 DBW pedal bracket. This bad boy lets you install any MK4 DBW pedal into your MK1 with just a few bolts. I’ve seen people in the past make funky brackets, or weld tabs onto their firewall to mount one. With this you can easily reverse your modifications if you ever decide to go back to a DBC setup.
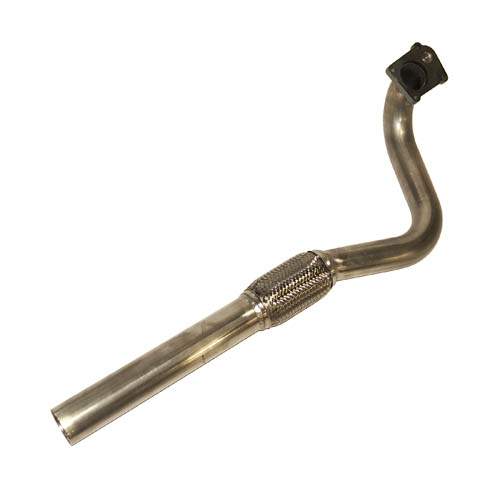
TT Stainless MK1 AHU Downpipe. While not necessary it makes the exhaust a piece of cake to do on the swap. Another, cheaper, option you could do is use the stock mk3 downpipe cut off short and then have an exhaust shop custom bend and weld in the rest of the downpipe and exhaust. I went this route on the AAZ caddy swap I just finished up. It works just fine but defiantly isn’t as pretty or flow as well.
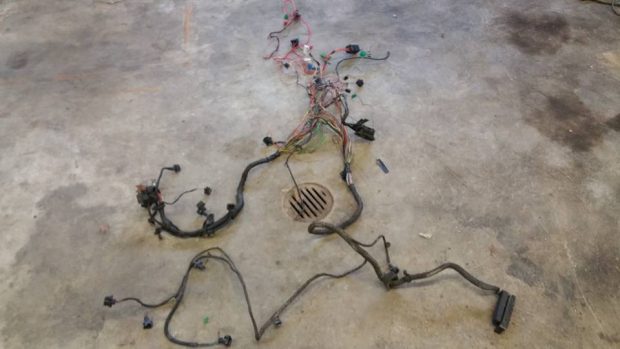
TDI wiring harness service. This part of the swap is what trips most guys up. We see the wiring harness and the diagrams in the Bentley and our minds stop working. The wiring harness service offered by S&P is an awesome way for most guys to get past the fear of wiring. Throw your old harness in a box, tell them to ‘shutup and take your money’, and they send you back a nice and labeled harness ready to rock. This is also great for Suzuki guys wanting to do a TDI swap in their Sammy, or for anyone wanting a standalone TDI application.
Enough with the parts, Lets get this swap going!
Now that we have gone over all of the components that make this TDI swap so easy lets actually get this show on the road. In video one we cover prepping your TDI for installation and cover the basics of the new motor mounts, starting on the cable clutch conversion, and starting the rod shift conversion while the motor is out of the truck.
Motor’s in, now its time to rock und roll.
In the next video we cover the rest of the cable clutch conversion, finishing up and adjusting the rod shift conversion and installing the downpipe.
But wait there’s more…
I’m not finished quite yet with the swap or editing videos for what I have done yet either. But I wanted to get this much of it up and live for you guys because I’ve had a lot of people asking me about the swap and have questions about how the mounts work and modifications to the tranny and stuff like that. I’ve got more info on how to prep your wiring harness, what intercoolers to use, and of course doing the wiring and making the beast run to add to it. If you have any suggestions or questions feel free to ask or leave them in the Facebook group at vwdiesel.net/fb
About the Author
VWDiesel Hello, I am the Administrator of VWDiesel. We started tuning in 2004 under the name Diesel Inside. Renamed to Malone Tuning Ltd. in 2009.
Related Posts
B5.5 Passat 2.0 TDI Transmission Fluid and Filter Change →

New Beetle Immobilizer delete process, also for MK4 Jetta or Golf →
MK4 Key Immobilizer and Remote Programing using VCDS and Vag-Tacho →
BuzzKen ALH EGR Delete and Racepipe Review and Install →
-
JD