Tonight the plate will get welded on and the plate for the opposite side will get made. With luck, the engine will be hanging in the car this weekend.
If the world economy completely collapses and we are thrust into a global apocalypse, I want you in my tribe :lol: .

If the world economy completely collapses and we are thrust into a global apocalypse, I want you in my tribe :lol: .
How did you know this diesel project is a momentary departure from my 2 seat experimental aircraft project ? :-)
I am still serious...when will you be fabbing up some peices so I can put my spare 1.6 in a caravan?
Ah !!! I thought you were teasing me... I could see that making the brackets after I have it installed would be much easier than when I made the first ones. So, after our Bambi season :-)
I have a much easier approach in mind for splicing the axel shafts. I don't have a lathe, so I have been fretting about the splice as I wanted to turn a solid shaft to go into the 2 hollow half shafts on the passenger side, and bore a tube for the solid shafts on the driver's side. The VW and Chrysler solid and hollow tubes are close in diameter, but not close enough. On the order of 0.050" or so.
Now, there's what I have come up with, very precision but no lathe... I cut all the half shafts to their max length, so the VW's got cut near the CV joint for the wheel bearing, and the Chrysler's got cut near the trans CV giving me almost 2/3 more shaft than I need. If I switch just the trans side shafts, I'll have telescoping shafts on both sides !! Now for the trick. After polishing the end of the solid, I'll rap it with a layer or 2 of sheet metal until the solid is a smooth fit into the hollow shaft. A second set of these bands, or shims will be made for the mid point in the solid shaft. This will eliminate most of the run-out. I will still use my dial indicator when I weld them together to be sure the run-out is zeroed as best as possible - a few tack welds followed my a few aligning hammer blows before solid welding.
Engine mount 2.0 :-)
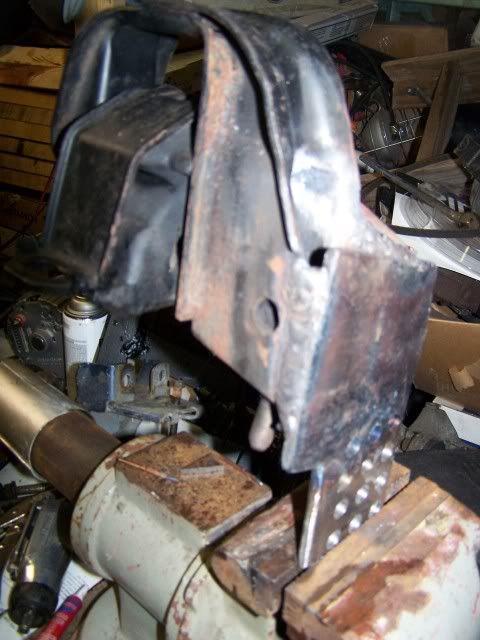
At closer inspection, my cut for the mount was not parallel to the engine.
So I turned the bracket to be.

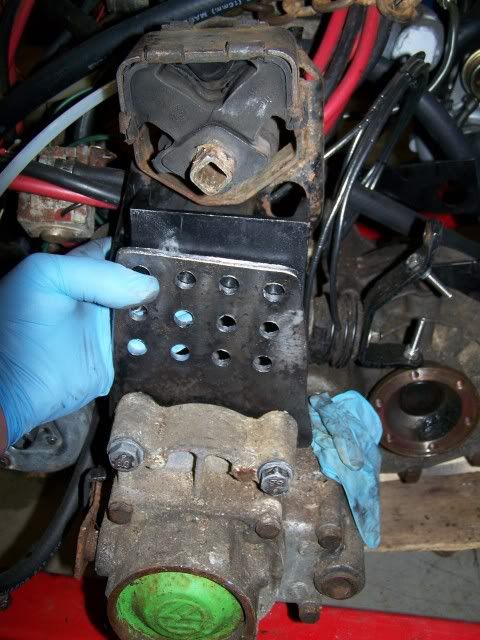
I decided to add a little more streingth to the mount as there will be a little bit of torque now that the support will be offset from the center of the VW mount.
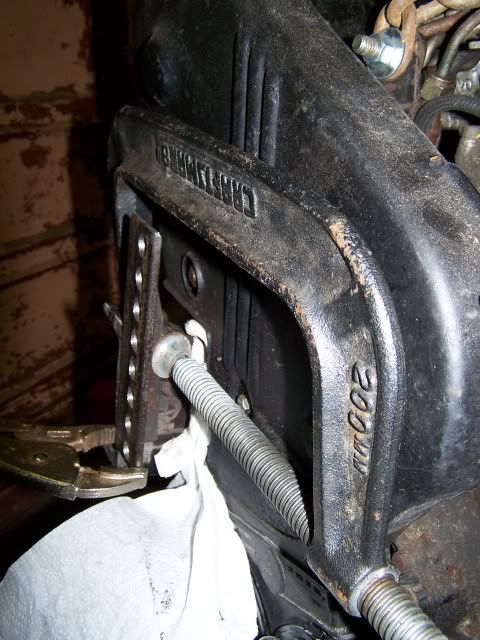
This bolts to the boss on the back of the block.
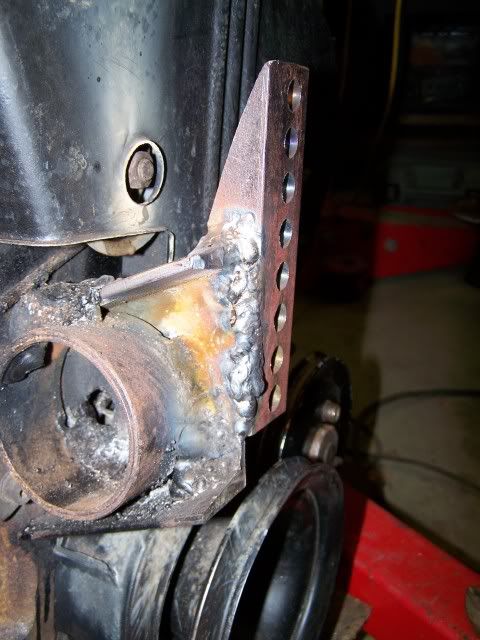
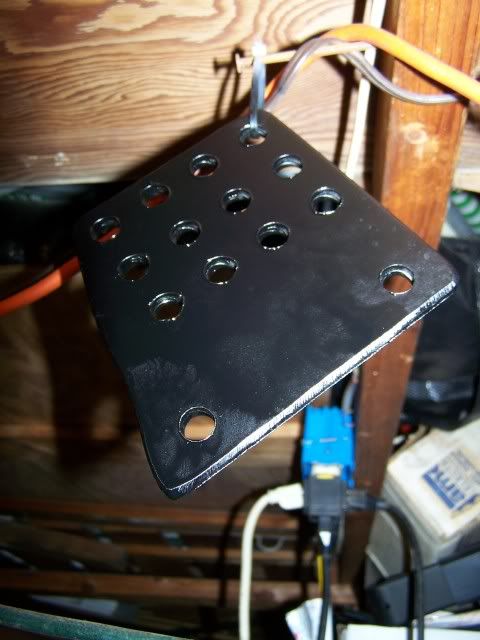
Lastly I made a multi mounting point plate of 1/4" high strength steel.
Today the engine should be in the car... I've said that before but this time it should be able to stay in the car.
Yesterday I finished the right and left engine mounts, after setting up my propane hunting heater - we got snow here for the first time last night. Here is the right side bolted with 3 bolts. If I'm happy with the location this time, I'll fill the other holes with bolts. They have nylon locking nuts on the back side.
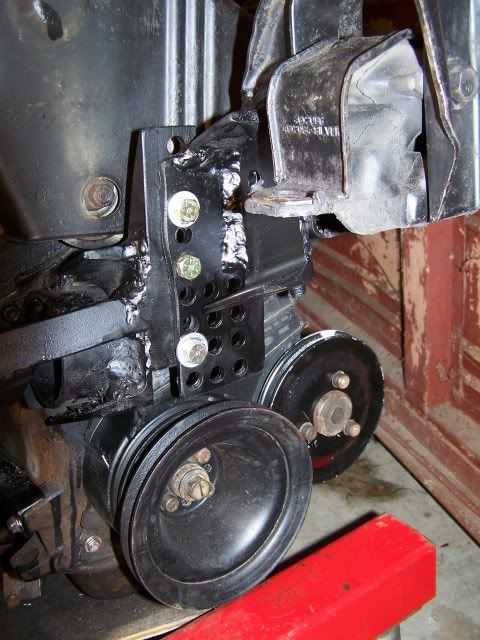
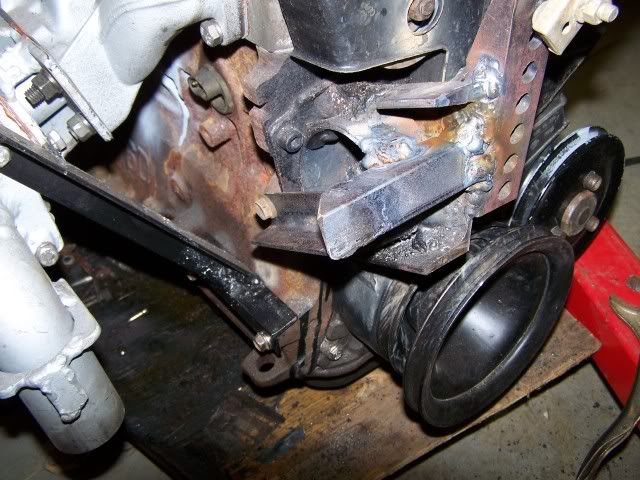
Here is the left side mount. I decided to move it down an inch and rearward and inch. This was very easy by cutting an angle cut to the bottom and drilling another hole. Also notice how the mount had a few degrees of twist before I rotated it. Now it is squared correctly.
Here it is with the trim piece. The nice thing is looking at the cut, my weld has uniform penetration. You can't see the separation point of the 2 pieces. It was quick and easy.
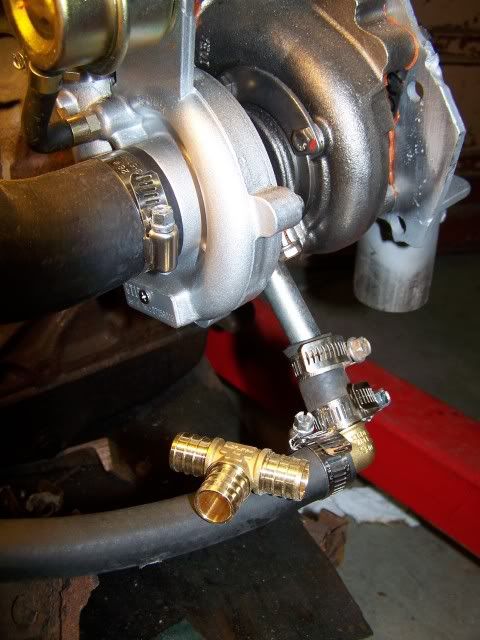
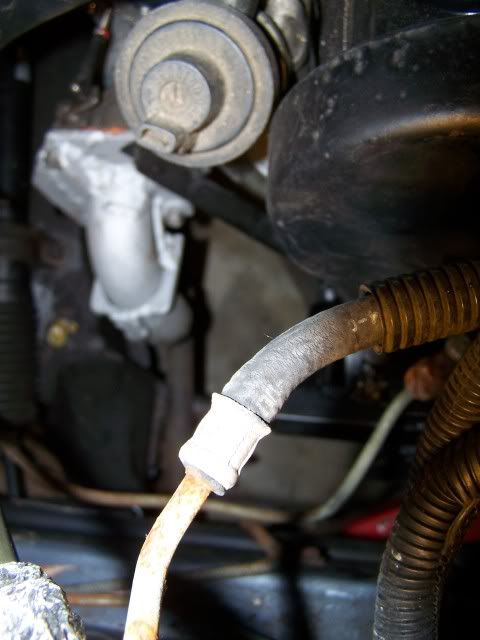
The other thing I did was change my turbo drain a bit. I found some solid brass fittings with ribs at Home Depot. Qestpak makes them. 5 "T" for $7.68. The elbows are a little less. My pan is not a turbo so I'll wait for my next build to do the full Monty. I need to be driving this before hunting season if I want to be in the North woods.
If my wife is up to helping me push the chassis tonight, the engine will be in tonight. If not, I'll plumb all the coolant lines tonight and shoot for the engine drop tomorrow night.
wheres the drain going?I had to enlarge my drain quite a bit.It wasnt able to "free"flow so it started backing up and out the seals
wheres the drain going?I had to enlarge my drain quite a bit.It wasnt able to "free"flow so it started backing up and out the seals
The drain is a 5/8" ID hose that follows the bell housing to the Vac pump port on the front of the block. Its just below the turbo bearings so there shouldn't be any back pressure.
Last night was not the best of times. We did put the engine in the car,
but I was suffering from Mirroritis or dyslexia because when I cut the trans mount, I moved the mount in the opposite direction I need.
On the plus side, the passenger side mount looks good.
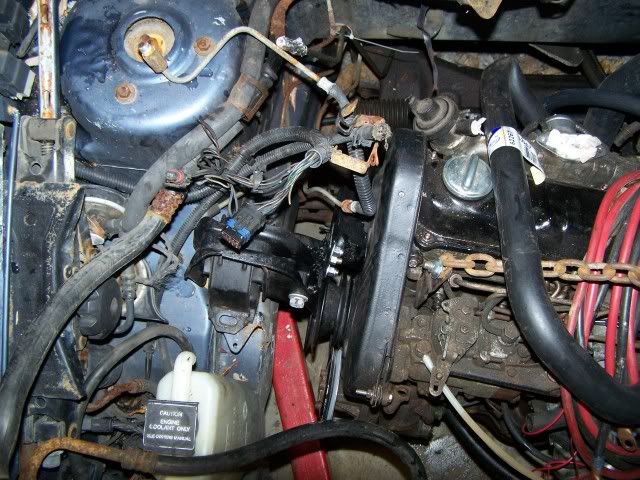
On the very down side, the "K" frame, that is the reason this is a "K" car, is not in a friendly place for the down tube on the turbo. It looks like I need to pull it off and clock it about 70 degrees so it is pointed rearward between the K member and the firewall.
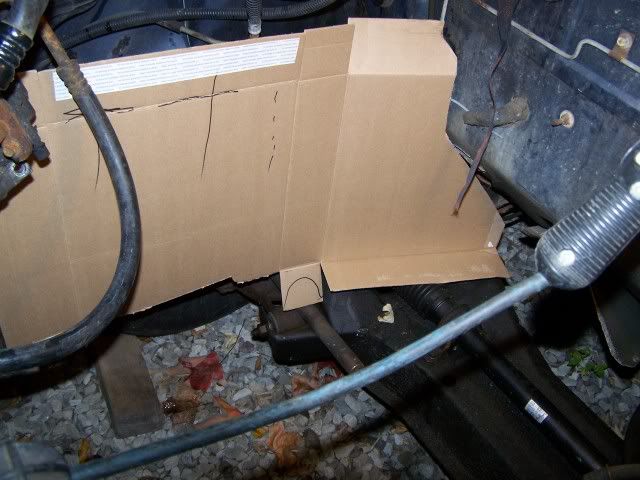
Last night I did something I should have done from the beginning. I don't know why I didn't do this basic step before. I made a template of both sides of the engine bay out of cardboard so the mounts would be dead on from the get go.
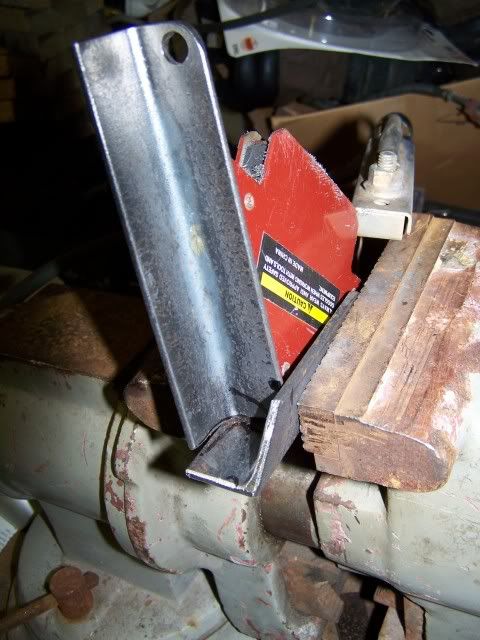
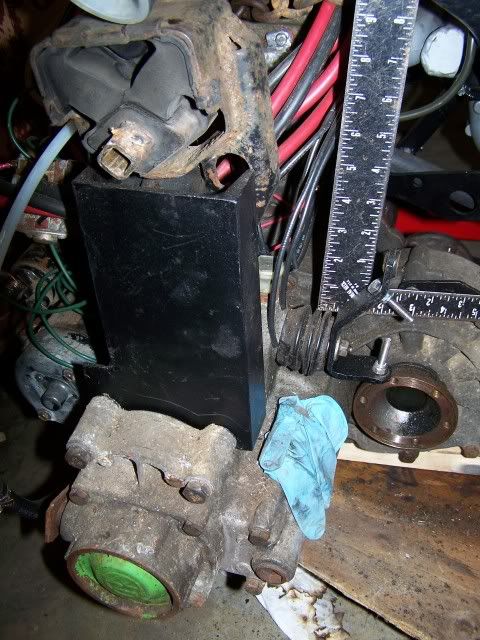
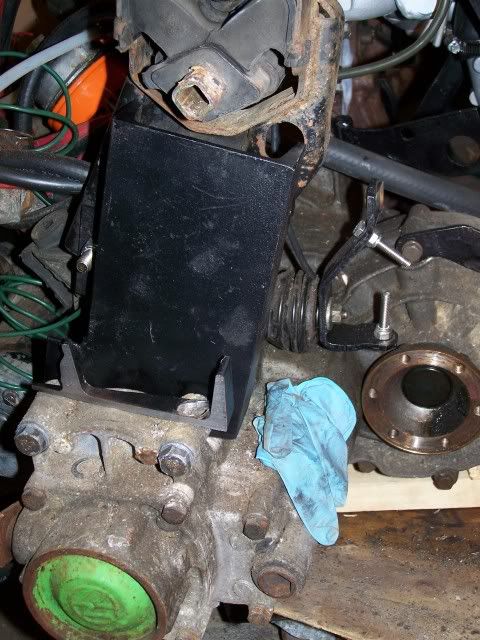
I decided the left mount would be easy if I made it adjustable like the right mount. Here I'm cutting off the lower plate:
Here they are separated. I'll drill a matrix on some 1/4" plate steel that will bolt to the trans. The upper half of the mount will have several holes on the flat surface to bolt to some of these in the matrix.
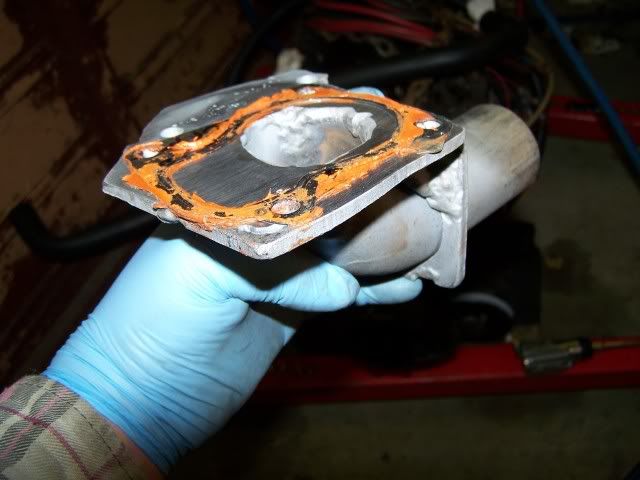
Here is the S.S. down pipe I need to clock about 70 degrees. I will only need to weld a little bit of material and drill a few holes.
You are very ambitious........good job.

THANKS !!! Its a lot of fun !!!
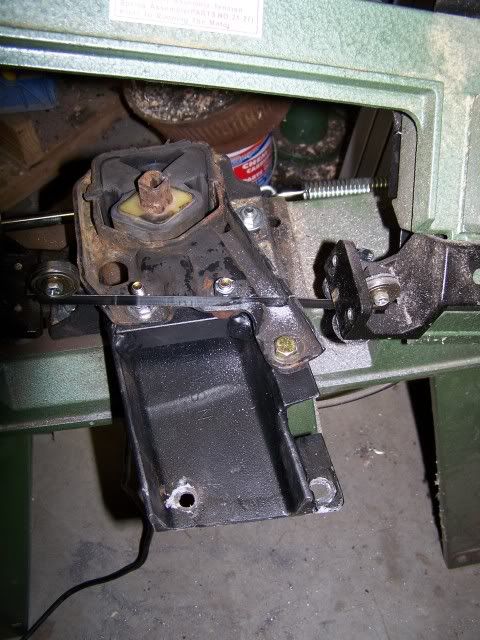
Last night I remade the trans mount. It is very adjustable...
Nice coat of rustoleum paint :-) After I blasted it with old school brake cleaner - trichloroethylene - its a very good degreaser, just don't breath it or get it on your skin.
I bevel ground the edges of the down pipe flange where I need to add 1/2" of plate steel.

This is the first year since I worked at the Nation's first University Hospital that I have not gotten a flu shot.
First year since then I have gotten the flu. Maybe a little Nighquil and I can do a little welding :-)
This is the first year since I worked at the Nation's first University Hospital that I have not gotten a flu shot.
First year since then I have gotten the flu. Maybe a little Nighquil and I can do a little welding :-)
ooo man that sucks!! nothing worse then being stuck home sick when your project is out there begging you to work on it!!
get well soon

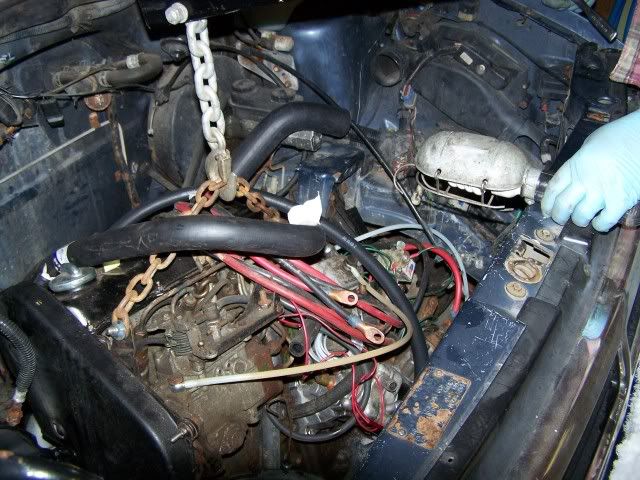
Yeah Man !!! Don't you know it. But, my lovely wife and I had a date with reality of diesels - my friend is the mechanic for a set of BIG diesels - a V-12 and V-16 - both from Detroit in the golden age of diesels and both 2 stroke slow turning beasts. It was the Michigan Star Clipper dinner train. The main engine, or as locomotive as they call it, is a 1953 Detroit electric locomotive. It has 1,500 shp at 800 rpm. Yes, slower than we idle. It idles at 5 gph at 256 rpm. Yes, that slow. I was taking these photos inside the engine bay an it was quite - more so than near out engine at idle. Unbelievable. I even got the turn at the controls ! WOW !!!! Here's some photos of the event... mind you, if you live near SE Michigan, the end of an era is a few months away as the tree huggers have offered the owner more for his line as a bike path than it is worth to his company ..
http://www.rail-road.comMy photos - the diesel photos are mostly at the bottom:
http://arb.net/dave/dinner.train.htm