S-PAutomotive.com

Author Topic: 1.6 NA Motor mount R&R pix or diagrams  (Read 3899 times)

October 20, 2010, 12:20:27 am

79rabbit4dr

  • Guest
1.6 NA Motor mount R&R pix or diagrams
« on: October 20, 2010, 12:20:27 am »
I've searched and found some discussion on how frustrating it is, but never a good picture of someone's bracket in the press showing what they did to get these fetchin motor mounts pressed in and out. I spent some time up at school on our ancient press with very little success. I think that an "L" shaped piece of steel that you could bolt the motor mount bracket to so that the actual motor mount sleeve was in line with the direction of the press instead of being off by 30* would be fabulous... unfortunately I have no welding equipment, materials, or skills. So I'd like to see what you all have done.

Here is what I had in mind...

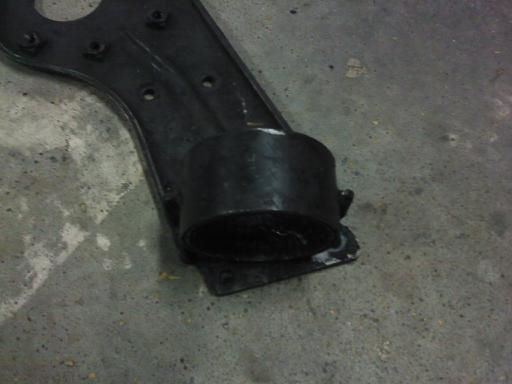
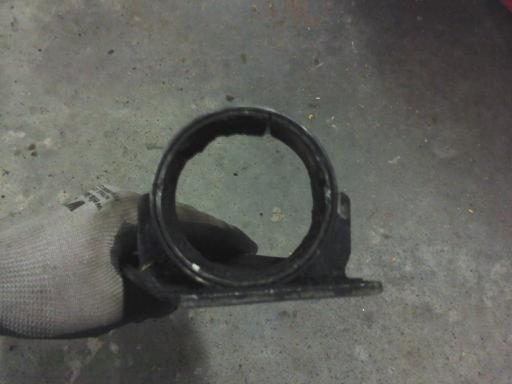
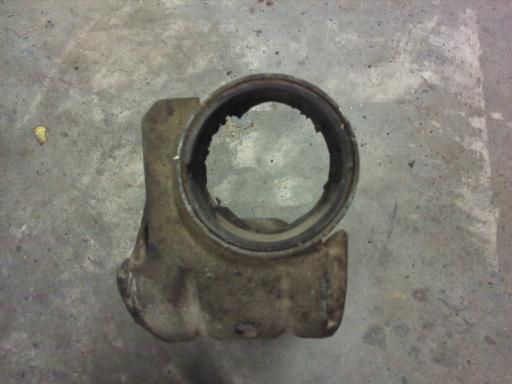
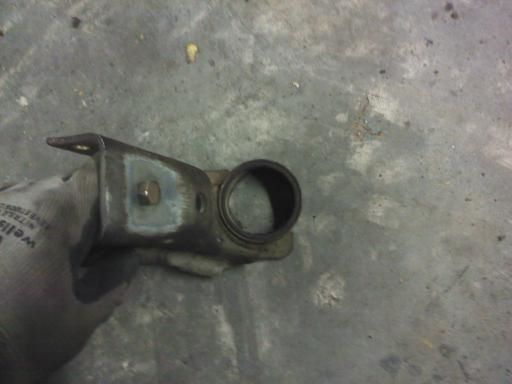
Passenger side motor mount;


BELOW: the green square is where the "|" part of the "L" shaped bracket would be and the blue line is the "_" part of the "L" and would be coming straight out at the camera. The Green, Yellow, and Red dots are the factory bracket holes I'd use to mount the factory bracket to the "L" bracket for pressing. Green = ok to use, Yellow = might work (if it doesn't interfere with pressing), Red = won't work.


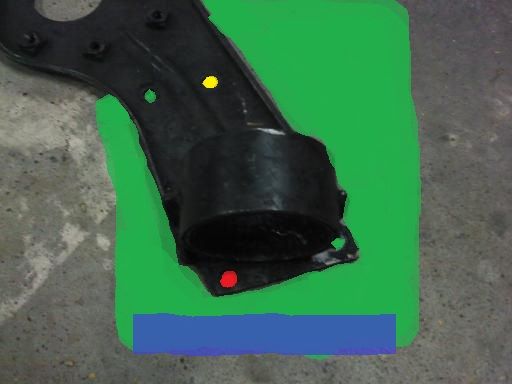
the MSpaint sketch didn't work out so well so I might go make a cardboard template to better illustrate my point.

The reason (I think) the Red one won't work.


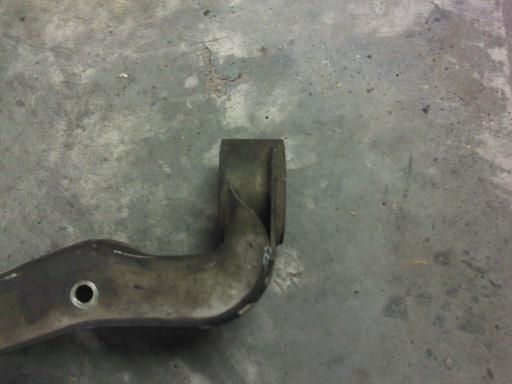
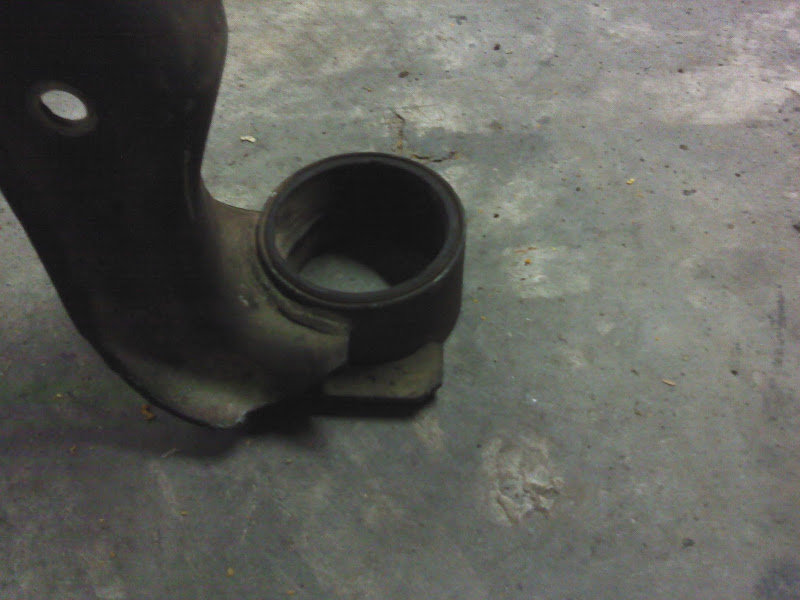
Driver side motor/trans mount Ideas for this side?;


Reply #1October 20, 2010, 01:28:18 am

Luckypabst

  • Veteran

  • Offline
  • ***

  • 502
Re: 1.6 NA Motor mount R&R pix or diagrams
« Reply #1 on: October 20, 2010, 01:28:18 am »
Holding the bracket off to the side like that will likely cause the bracket to deform or even tear. You need to support the round part from underneath, inline with the pressing force, with clearance for the motor mount to pass through when it pushes out. With a hydraulic press, that means you might need a 15" long section of heavy tube so you can clear the rest of that bracket.

I was dead-set on using my C-frame ball joint press but didn't have the materials on hand to make the necessary support and "pusher". I ended up cutting through the steel shell of the mount and it popped right out.

Chris
'82 TD Westy
'81 NA Caddy

Reply #2October 20, 2010, 02:35:48 am

79rabbit4dr

  • Guest
Re: 1.6 NA Motor mount R&R pix or diagrams
« Reply #2 on: October 20, 2010, 02:35:48 am »
I ended up cutting through the steel shell of the mount and it popped right out.

How much force does it take to press in the new one? If I cut the old one out, will the new one go in easily enough to utilize the bracket idea above or are they still press fit only?

Reply #3October 20, 2010, 03:18:35 am

Quantum TD

  • Veteran

  • Offline
  • ***

  • 1195
Re: 1.6 NA Motor mount R&R pix or diagrams
« Reply #3 on: October 20, 2010, 03:18:35 am »
Bentley has a nice image of someone using a hack saw set into the mount to cut the outer perimeter. Sawzall works just as well, just watch how deep you go.

Installing is still press fit, and a PITA. I often end up deforming the new mount a bit to match the deformed bracket. I also often grind the edge down a bit to give it more of a tapered edge.

Reply #4October 20, 2010, 03:37:56 am

quasi

  • User+

  • Offline
  • *

  • 26
Re: 1.6 NA Motor mount R&R pix or diagrams
« Reply #4 on: October 20, 2010, 03:37:56 am »
I cut mine out with a hacksaw.  Then i pressed mine in with a old front wheel bering off my caddy.  It took a little force, then it started to go easilly.
1981 VW Caddy
1984 Saab turbo
1974 1/2 MGB-GT

Reply #5October 24, 2010, 05:50:34 pm

79rabbit4dr

  • Guest
Re: 1.6 NA Motor mount R&R pix or diagrams
« Reply #5 on: October 24, 2010, 05:50:34 pm »
Well, after trying to create something that could be used repetitively and easily (maybe as a service to forum members), It definitely is easiest to just cut out the rubber and then cut a relief slit in the center ring with a Sawzall (being careful not to cut the bracket itself), then use a mini-sledge and center punch and the ring basically falls out (compared to no relief cut). After that, tapping or pressing in the new motor mounts isn't that difficult. I used a vise, a sacrificial piece of square tubing, and a mini-sledge. As an afterthought I probably could have used some wheel bearing grease, or assembly lube to ease the tapping in process.

Hopefully this is a more definitive answer to anyone who's preparing to replace their motor mounts soon.

Reply #6October 26, 2010, 01:48:54 am

rabbitman

  • Veteran

  • Offline
  • ***

  • 2787
Re: 1.6 NA Motor mount R&R pix or diagrams
« Reply #6 on: October 26, 2010, 01:48:54 am »
I think cutting it and pounding it out and then pressing in the new one is the way to go.
'82 Rabbit, I put on a euro vnt-15, 2.25" DP, 2.5" exhaust, the result.....it whistled.

I removed the turbo, made a toilet bowl 2.5" DP, the result....it was deafening. Now it has a homemade muffler up front and a thrush in the rear, the result.....less loud.
Watch: AGENDA, GRINDING AMERICA DOWN


S-PAutomotive.com