For the past month or two, I have been stripping out the golf's interior, painting/dyeing everything black, and cleaning / repairing rust. I have also been adding sound deadening because the diesel engine is pretty noisy. I plan to have a nice stereo system in eventually and I want to hear it instead of the engine. I also replaced my heater core and cleaned out all the ventilation ducts which were full of mold. The cold/hot flap in the heater core compartment had holes in the foam so no matter what temperature setting it was on, it always blew blazing hot (sucks in the summer). This all is a lot of work and I'll write up the rust repair first.
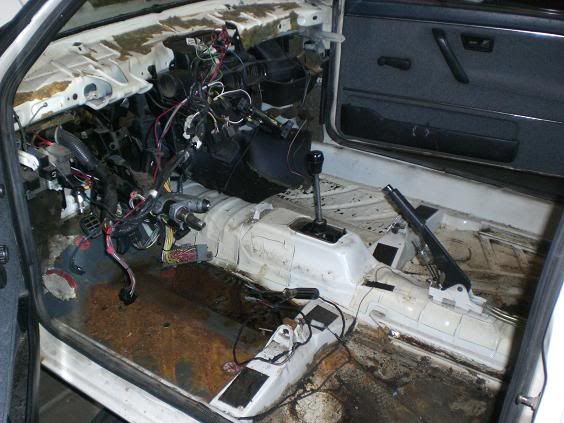
To start off, I removed the entire interior.
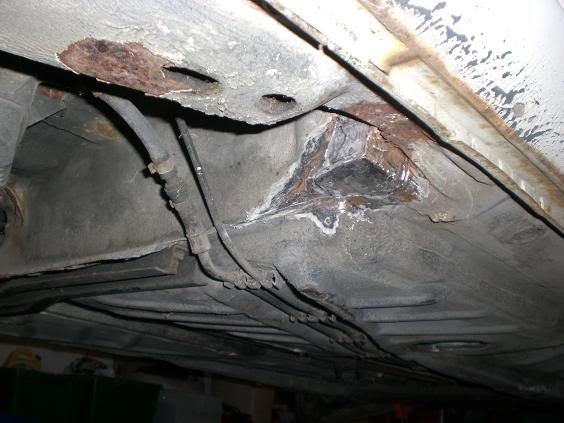
Lots of rust:
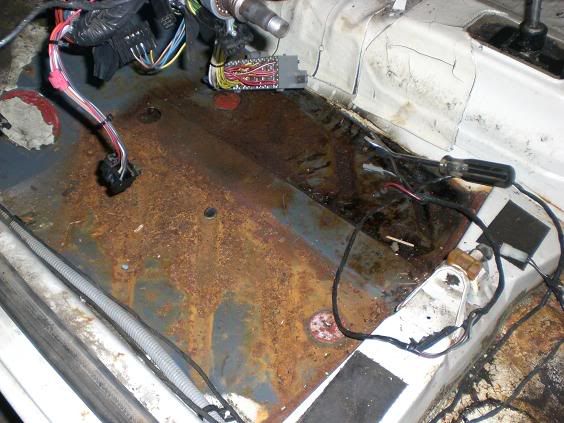
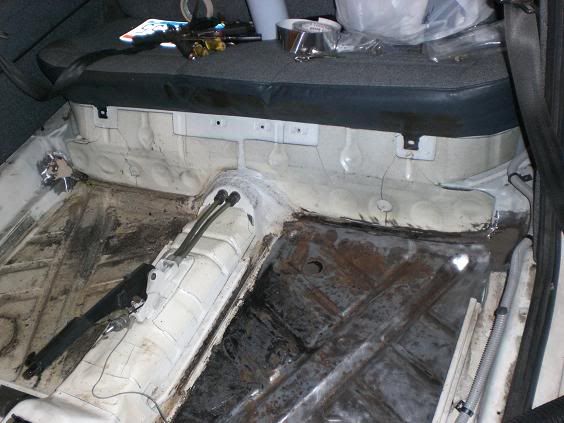
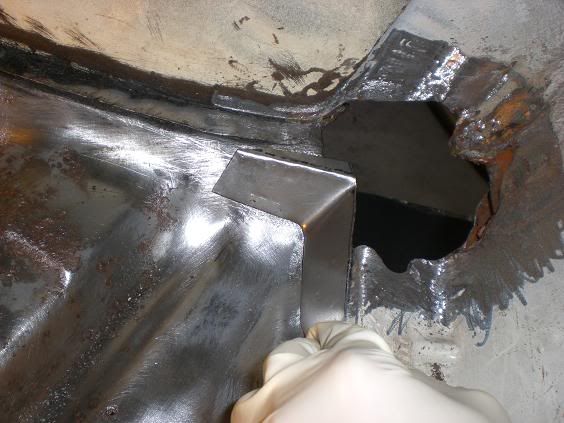
I found two huge holes due to rust in both corners of the car. They were located where the rear seat meets the floor boards. They were located in the corners, so I would have to get fancy with my metal work to replicate all of the angles.
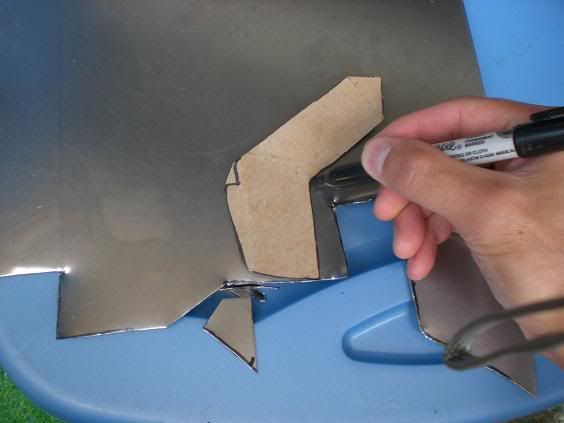
So I began with cardboard templates that I fit with trial and error. Then I transfered the cardboard template to some sheet metal:
I bent the metal to the correct shape:
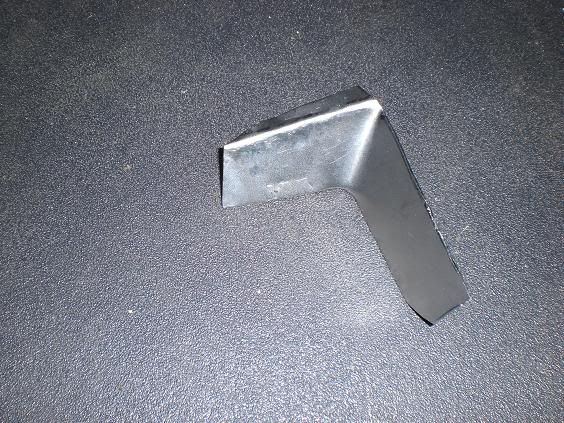
Fitting the metal:
More metal:
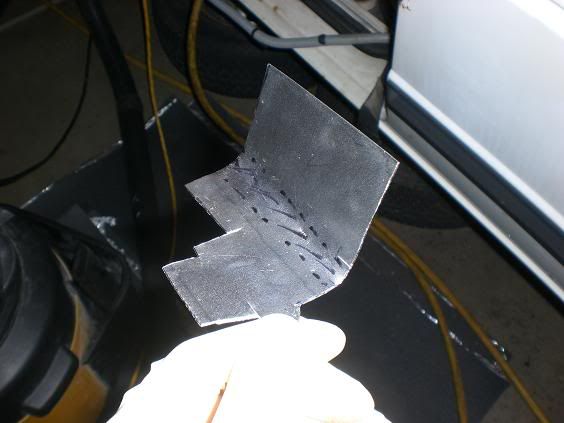
More test fitting:
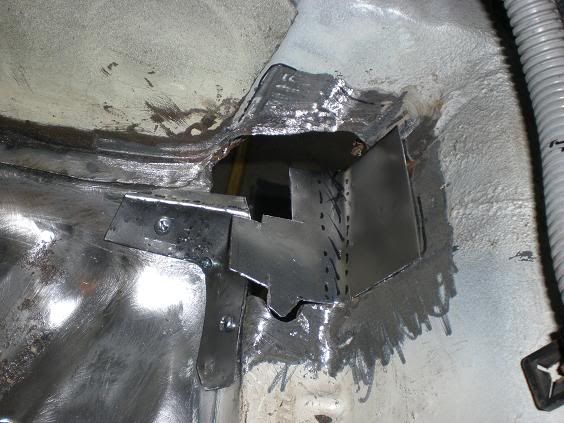
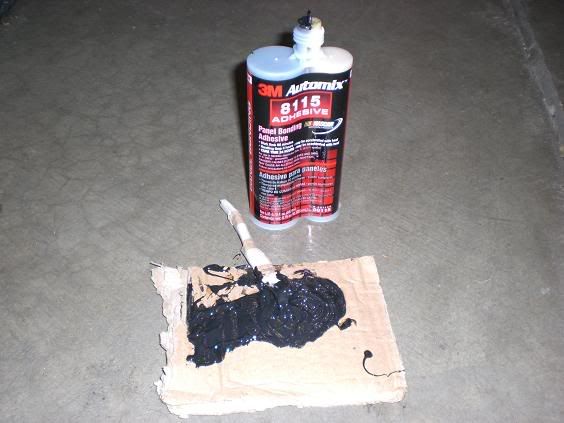
I recently bought a flux core welder. But I quickly found out that flux core welding is very difficult for this thin metal work. So I went with panel adhesive. This is newer adhesive technology that some car makers are now using for non-structural metal bonding. It is supposed to be stronger than a weld when the metal is prepared correctly. I wire-brushed off all the paint and wiped both surfaces down with acetone. Then I mixed this epoxy type stuff and put it on the metal using screws to secure the sheet metal while the panel adhesive does its work.
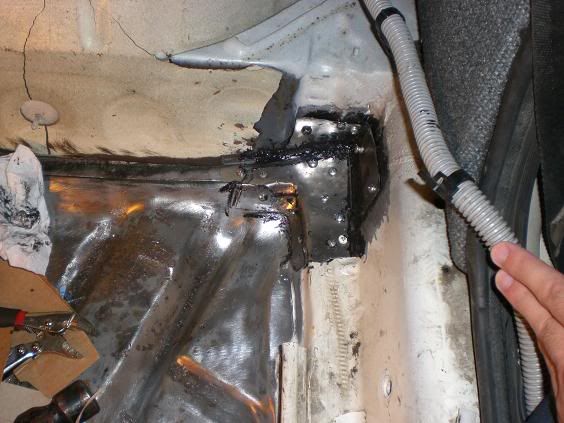
Here is the completed repair. This was taken after I spent a few days ripping up all the sticky tar sound deadening with a heat gun and a putty knife. There is also a dry-ice method but I didn't use that. After the putty knife, I wirebrushed all the metal and wiped it down with acetone. The repair is pretty messy and ugly looking but it should be pretty strong and protect any mice from crawling though the gaping hole that used to be there. Nobody will see it because it is going to be under new sound deadener and carpet. I will grind off the screws later.
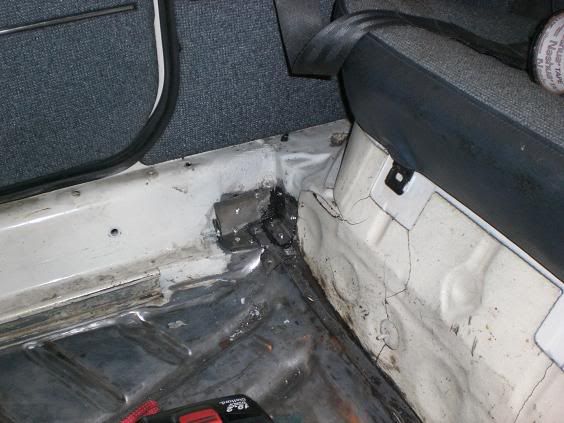
Here is the other side being prepped for repair:

Repaired. Pretty yucky looking but it will do the job. I plan to use seam sealer to seal any tiny holes between the metal/glue.
This is what it looks like from under the car. I will grind off all the crap protruding in a bit.
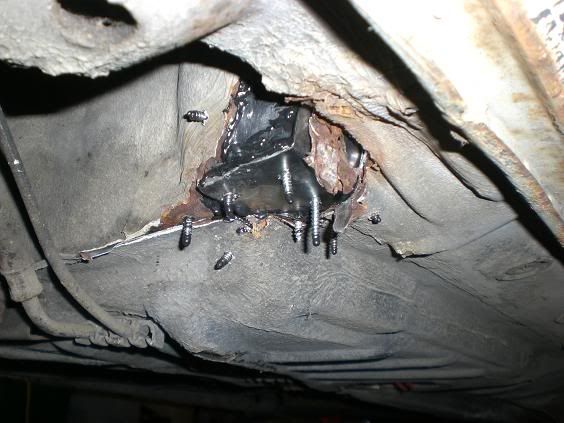
After using a grinder, the repair looks pretty good!
This is where I stopped today. Tomorrow I will grind some more and start prepping the area for some rust protection. I am going to use 'Rust Bullet' to prevent any future rust and then seal everything up with seam sealer. Then I will start sound deadening the car.

 Topic: My 1985 Golf 1.6 N/A Build Thread - No 56k! Picture Time! (Read 45740 times)

